Easy Homemade Cereal Bars – Healthy On-the-Go Snack
Cereal bars are the ultimate grab-and-go champions, aren’t they? I mean, who doesn’t love a sweet, satisfying crunch that you can enjoy anywhere, anytime? Whether it’s a quick breakfast on a chaotic morning, an afternoon pick-me-up, or a post-workout refuel, these delightful treats have become a staple for a reason. They’re incredibly versatile, allowing you to customize flavors and textures to your heart’s content. What truly makes cereal bars special is their ability to transform humble breakfast cereal into something truly extraordinary. Forget those store-bought versions loaded with artificial ingredients and sky-high sugar; we’re going to create homemade wonders that are both delicious and delightfully customizable. Get ready to discover just how easy and rewarding it is to make your own perfect batch of cereal bars!
Homemade Cereal Bars: Your New Go-To Snack!
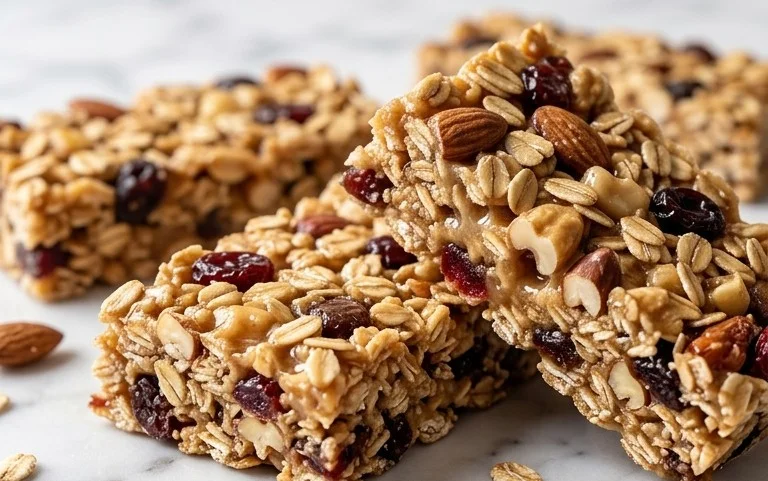
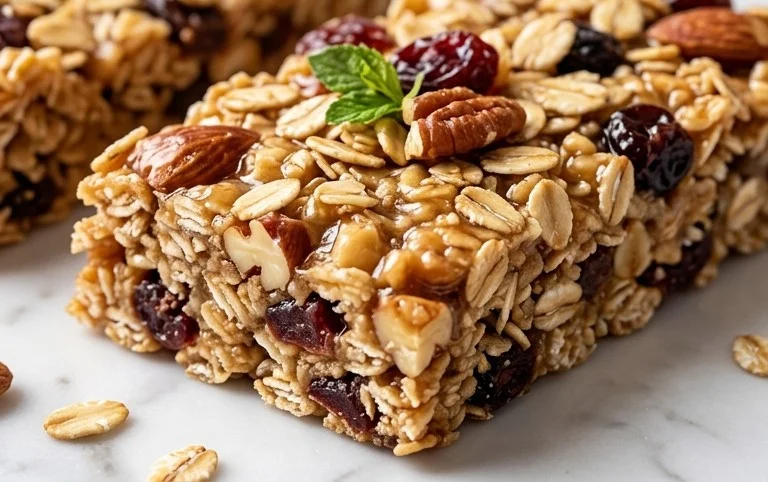
Looking for a quick, delicious, and customizable snack that’s perfect for on-the-go energy or a healthy treat? Look no further than these incredibly simple homemade cereal bars! Forget those pre-packaged options with ingredients you can barely pronounce. We’re talking about a recipe where you control the goodness, using just a handful of pantry staples and your favorite cereal. These bars are a fantastic way to use up leftover cereal, create a satisfying breakfast alternative, or fuel your adventures. Plus, they’re so easy, even a beginner can whip up a batch in no time. Let’s get started!
Ingredients:
- 3 cups cereal of choice (think crunchy flakes, puffed rice, granola, or a mix!)
- 2/3 cup peanut butter or nut butter of choice (almond butter, cashew butter, sunflower seed butter – the options are endless!)
- 1/2 cup agave, honey, or brown rice syrup (for that perfect chewy binder)
- optional 1/2 tsp salt (enhances the sweetness and nuttiness)
- optional 3 tbsp protein powder (for an extra protein boost)
Crafting Your Perfect Cereal Bar
The beauty of these cereal bars lies in their adaptability. Don’t feel limited by the basic ingredients. Think about what you love! Do you adore chocolate? Toss in a handful of chocolate chips. Craving something fruity? Dried cranberries or raisins are a fantastic addition. Nuts and seeds? Absolutely! This recipe is a blank canvas for your culinary creativity. The key is ensuring your cereal is mostly dry and crunchy, as a soggy cereal will result in mushy bars. If your cereal is a bit stale, don’t worry, it’s perfect for this recipe.
Getting Started with the Base
Before we dive into mixing, let’s prepare our pan. You’ll need an 8×8 inch baking pan. Line it with parchment paper, leaving some overhang on the sides. This overhang acts as handles, making it super easy to lift the entire slab of cereal bars out of the pan once they’ve set. Trust me, this little trick makes a world of difference when it comes time to slice and serve. You can also lightly grease the pan with cooking spray if you don’t have parchment paper, but the parchment paper method is generally cleaner and easier.
Mixing the Magic Binder
This is where the magic happens. In a medium-sized microwave-safe bowl, combine your peanut butter (or nut butter of your choice) and your liquid sweetener – agave, honey, or brown rice syrup. If you’re using the optional salt, add it now. If you’re adding protein powder, whisk it in thoroughly at this stage as well, to avoid clumps later on. Microwave this mixture in 30-second intervals, stirring well after each interval, until it’s smooth and pourable. You don’t want it boiling, just warm enough to become easily mixed. Be careful not to overheat it, or it can become difficult to work with. The goal is a nicely emulsified, slightly sticky binder.
Combining and Pressing
Now, it’s time to bring it all together. Pour the warm, gooey binder mixture over your 3 cups of cereal in a large mixing bowl. Gently but thoroughly fold the cereal into the binder, ensuring every single piece of cereal is coated. You want it to be evenly distributed. This might take a minute or two. Don’t rush this step; good coating is essential for the bars to hold their shape. Once everything is well combined, transfer the mixture to your prepared 8×8 inch baking pan.
The Art of the Press
This is arguably the most crucial step for creating well-formed bars. You need to press the cereal mixture firmly and evenly into the pan. Use the back of a spatula, a piece of parchment paper, or even your hands (lightly greased if needed) to really compact the mixture. The firmer you press, the more cohesive and less crumbly your bars will be. Pay special attention to the corners and edges, ensuring they are packed down tightly. A good, even press will make slicing much easier and prevent your bars from falling apart.
Setting and Slicing
Once you’ve pressed the mixture down as much as possible, place the pan in the refrigerator for at least 1-2 hours. This chilling time is essential for the bars to firm up and hold their shape. You can even leave them in overnight for the best results. After the chilling period, carefully lift the entire slab out of the pan using the parchment paper overhang. Place it on a cutting board and use a sharp knife to cut the slab into your desired bar shapes. Smaller bars are great for kids or a light snack, while larger bars are perfect for a more substantial treat.
Enjoying Your Homemade Goodness
Store your finished cereal bars in an airtight container at room temperature for a few days, or in the refrigerator for up to a week. They’re fantastic for packing in lunchboxes, taking on hikes, or just having on hand for a quick energy boost. Experiment with different cereal combinations and add-ins to discover your perfect flavor profile. Happy snacking!
Conclusion:
There you have it! This simple yet incredibly versatile cereal bar recipe is a game-changer for busy mornings, post-workout snacks, or anytime you need a satisfying bite. Its brilliance lies in its adaptability – you can easily customize it with your favorite cereals, dried fruits, nuts, and even a drizzle of chocolate. The combination of crunchy textures and sweet, wholesome goodness makes these cereal bars a guaranteed hit for both kids and adults. I find they’re perfect for packing in lunchboxes, taking on hikes, or simply enjoying with a glass of milk for a quick and nutritious pick-me-up.
Don’t be afraid to experiment with different flavor profiles. Perhaps add some cinnamon for warmth, a pinch of nutmeg, or even some shredded coconut for an tropical twist. The possibilities are truly endless! So, I wholeheartedly encourage you to give this cereal bar recipe a try. It’s incredibly rewarding to create delicious, homemade treats that are healthier and more budget-friendly than store-bought options.
Frequently Asked Questions:
Can I make these cereal bars vegan?
Absolutely! To make these cereal bars vegan, simply substitute the honey or maple syrup with agave nectar or another vegan liquid sweetener. Ensure your chosen cereal and any add-ins like chocolate chips are also vegan-friendly.
How should I store these cereal bars?
For the best texture and freshness, store your cereal bars in an airtight container at room temperature for up to 3-4 days. If you live in a warm climate or prefer them slightly firmer, you can refrigerate them, though they might become a little harder. They also freeze well for longer storage!
My cereal bars are too sticky. What went wrong?
This usually happens if there wasn’t enough binder (like the melted marshmallows or the sticky syrup mixture) to hold everything together, or if the mixture wasn’t pressed down firmly enough. Ensure you’re using the recommended amounts of binder and press the mixture very tightly into your pan before cutting.
Easy Cereal Bars
Simple and customizable cereal bars made with your favorite cereal and a sweet binder.
Ingredients
-
3 cups cereal of choice
-
2/3 cup peanut butter or nut butter of choice
-
1/2 cup agave, honey, or brown rice syrup
-
1/2 tsp salt (optional)
-
3 tbsp protein powder (optional)
Instructions
-
Step 1
Line an 8×8 inch baking pan with parchment paper, leaving an overhang on the sides. -
Step 2
In a large bowl, combine the cereal of your choice. -
Step 3
In a microwave-safe bowl, combine the peanut butter (or nut butter of choice) and the agave, honey, or brown rice syrup. Microwave in 30-second intervals, stirring in between, until well combined and smooth. -
Step 4
If using, stir in the optional salt and protein powder into the wet mixture until smooth. -
Step 5
Pour the wet mixture over the cereal in the large bowl. Stir gently until the cereal is evenly coated. -
Step 6
Press the mixture firmly and evenly into the prepared baking pan using the parchment paper overhang or another piece of parchment paper. -
Step 7
Refrigerate for at least 30 minutes, or until firm. -
Step 8
Lift the bars out of the pan using the parchment paper overhang. Cut into desired bar shapes.
Important Information
Nutrition Facts (Per Serving)
It is important to consider this information as approximate and not to use it as definitive health advice.
Allergy Information
Please check ingredients for potential allergens and consult a health professional if in doubt.