Fluffy Yeast Doughnuts-Perfectly Light & Crispy
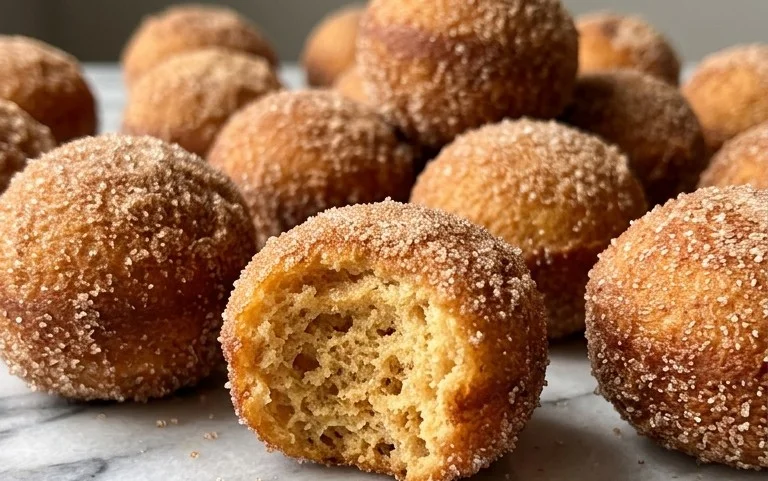
Perfect Yeast Doughnuts are more than just a sweet treat; they’re a golden ring of pure happiness. There’s a nostalgic magic that surrounds these fluffy, airy delights, a comforting aroma that instantly transports us back to childhood mornings or cozy weekend brunches. What truly makes perfect yeast doughnuts so beloved is their incredible texture – a delicate crispness on the outside giving way to an impossibly soft, pillowy interior. Unlike their cake doughnut cousins, yeast doughnuts achieve a lightness that’s simply unparalleled. Mastering the art of crafting these tender wonders at home might seem daunting, but I promise you, the reward of biting into your own warm, freshly fried creation is absolutely worth every moment. We’re diving deep into the secrets to achieving that perfect rise, that ideal chew, and that irresistible glaze.
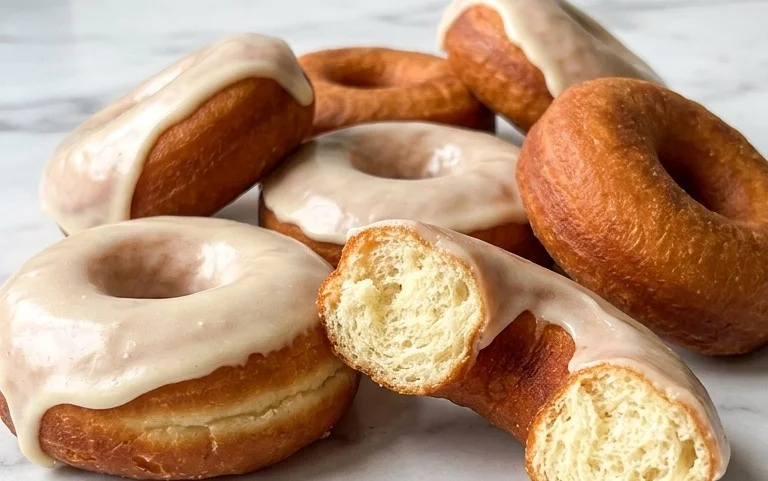
Perfect Yeast Doughnuts
There’s something truly magical about a perfectly risen, impossibly fluffy yeast doughnut. Forget the dense, heavy impostors; we’re talking about a cloud-like interior with a delicate crisp exterior, ready to be dipped, drizzled, or filled with pure joy. This recipe is my go-to, meticulously tested to ensure success, even if you’re new to the wonderful world of yeasted baking. The key lies in patient proofing and the right ingredients, which we’ll break down right here. Get ready to impress yourself and anyone lucky enough to share these treats!
Ingredients:
- 6 Tbsp water (lukewarm)
- 5 oz buttermilk (at room temperature)
- 1 egg (at room temperature)
- 2 oz butter (melted)
- 16 oz all-purpose flour ((or bread flour))
- 2 oz sugar
- 1 tsp salt
- 1 ½ tsp quick-rise yeast ((or regular dried yeast) )
- 16 oz olive oil (for frying)
- 4 oz sugar ((1/2 cup or more as needed for coating the doughnuts))
- jam, chocolate hazelnut spread, and or whipped cream for filling, if desired ((various amounts as needed))
Making the Dough
The journey to perfect doughnuts begins with activating our yeast. In a small bowl, combine the lukewarm water with the quick-rise yeast. Give it a gentle stir and let it sit for about 5-10 minutes. You should see it become foamy and bubbly – a sure sign your yeast is alive and ready to work its magic. If it doesn’t foam, your yeast might be old, and it’s best to start with a fresh packet.
Next, in the bowl of a stand mixer fitted with the dough hook attachment (or in a large mixing bowl if you’re kneading by hand), combine the activated yeast mixture, the room temperature buttermilk, the room temperature egg, and the melted butter. Whisk these wet ingredients together until well combined.
Now, it’s time to add our dry ingredients. Add the all-purpose flour (bread flour will give you a slightly chewier doughnut, which is also fantastic!), sugar, and salt to the wet ingredients. Mix on low speed until the ingredients just start to come together into a shaggy dough.
Increase the mixer speed to medium-low and continue to knead the dough for about 8-10 minutes. If you’re kneading by hand, turn the dough out onto a lightly floured surface and knead for about 10-15 minutes. The dough should become smooth, elastic, and pull away from the sides of the bowl. It will still be slightly sticky, which is perfectly fine and contributes to the doughnut’s soft texture.
First Proofing
Lightly grease a clean bowl with a little oil or cooking spray. Place the kneaded dough into the bowl, turning it to coat all sides with the grease. Cover the bowl tightly with plastic wrap or a clean kitchen towel. Find a warm, draft-free spot in your kitchen to let the dough rise. This is called the first proof. It typically takes about 1 to 1.5 hours, or until the dough has roughly doubled in size. Patience here is key! A good, slow rise develops flavor and creates that signature light texture.
Shaping the Doughnuts
Once your dough has doubled, gently punch it down to release the air. Turn the dough out onto a lightly floured surface. You can roll the dough out to about ½-inch thickness using a rolling pin.
Using a doughnut cutter or two round cookie cutters of different sizes (one for the outer ring and a smaller one for the inner hole), cut out your doughnuts. Be sure to press down firmly to get clean cuts. You can gather and re-roll the scraps once, but be careful not to overwork the dough. Place the cut doughnuts onto parchment-lined baking sheets, leaving a little space between them. This makes transferring them to the hot oil much easier later.
Second Proofing
Cover the cut doughnuts loosely with plastic wrap or a light kitchen towel. Let them proof for a second time in a warm place for another 30-45 minutes, or until they look puffy and have increased in size again. They should feel light to the touch. This second proof is crucial for achieving that airy, tender crumb. Don’t rush this step!
Frying the Doughnuts
Now for the exciting part – frying! Heat the olive oil in a large, heavy-bottomed pot or Dutch oven over medium heat until it reaches about 350°F (175°C). If you don’t have a thermometer, you can test the oil by dropping a small piece of dough into it; it should sizzle and rise to the surface immediately.
Carefully slide 2-3 doughnuts at a time into the hot oil, being careful not to overcrowd the pot. Fry them for about 1-2 minutes per side, or until they are golden brown and puffed up. Use a slotted spoon or spider strainer to flip them and then to remove them from the oil.
Place the fried doughnuts on a wire rack set over a baking sheet to drain any excess oil. While they are still warm, you can toss them in the 4 oz of sugar for a classic coating. If you prefer a glaze, you can prepare one while the doughnuts are frying and dip them once they’ve cooled slightly.
Filling and Serving
Once cooled enough to handle, you can fill your doughnuts if you desire. A piping bag fitted with a long, thin tip works best for injecting fillings like jam, chocolate hazelnut spread, or even a light pastry cream. Serve immediately for the best texture, perhaps with a glass of milk or your favorite hot beverage. These perfect yeast doughnuts are best enjoyed fresh, but they can be stored in an airtight container at room temperature for a day or two. Enjoy every bite of your homemade deliciousness!
Conclusion:
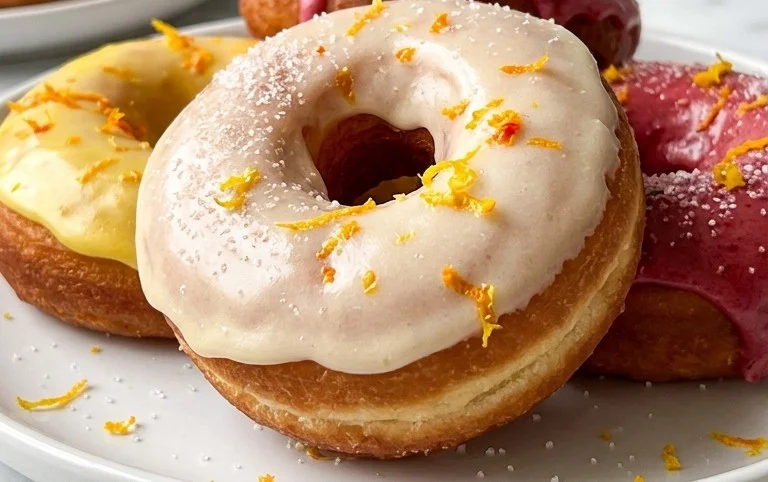
And there you have it! Crafting these perfect yeast doughnuts at home is not only incredibly rewarding but surprisingly achievable. The beauty of this recipe lies in its simplicity and the incredible lightness and tender crumb it produces, a stark contrast to often heavy, store-bought versions. The slight chewiness from the yeast, coupled with that delicate, melt-in-your-mouth texture, makes these doughnuts truly irresistible. I encourage you to embrace the process; the aroma filling your kitchen as they fry is an experience in itself! Whether you’re a seasoned baker or just starting, this recipe is designed to deliver delicious results. Serve them warm, dusted with powdered sugar, glazed with a classic vanilla or chocolate icing, or even filled with your favorite jam. The possibilities for enjoyment are endless!
Frequently Asked Questions:
Can I make these doughnuts ahead of time?
While these perfect yeast doughnuts are best enjoyed fresh, you can prepare the dough a day in advance and refrigerate it overnight. Let it come to room temperature for about 30-60 minutes before shaping and frying. This makes for an even easier morning treat!
What’s the best way to store leftover doughnuts?
For optimal freshness, store leftover doughnuts in an airtight container at room temperature for up to 2 days. Avoid refrigerating them, as this can make them stale. For longer storage, you can freeze plain, unfrosted doughnuts and reheat them gently in a low oven.
Are there any dairy-free or vegan options for this recipe?
Absolutely! To make this recipe dairy-free and vegan, you can substitute the milk with a plant-based milk like almond or soy milk, and use a vegan butter alternative for the richness. Ensure your yeast is also vegan-friendly, which most are.
Perfect Yeast Doughnuts
Achieve perfectly fluffy and delicious yeast-raised doughnuts with this classic recipe. Ideal for breakfast or a sweet treat, customizable with your favorite fillings and coatings.
Ingredients
-
6 Tbsp water (lukewarm)
-
5 oz buttermilk (at room temperature)
-
1 egg (at room temperature)
-
2 oz butter (melted)
-
16 oz all-purpose flour
-
2 oz sugar
-
1 tsp salt
-
1 ½ tsp quick-rise yeast
-
16 oz olive oil (for frying)
-
4 oz sugar (for coating)
-
jam, chocolate hazelnut spread, and or whipped cream for filling
Instructions
-
Step 1
In a large bowl, combine the lukewarm water and quick-rise yeast. Let it sit for about 5-10 minutes until foamy. -
Step 2
Add the buttermilk, egg, and melted butter to the yeast mixture. Whisk to combine. -
Step 3
In a separate bowl, whisk together the all-purpose flour, sugar, and salt. -
Step 4
Gradually add the dry ingredients to the wet ingredients, mixing until a shaggy dough forms. Turn out onto a lightly floured surface and knead for 8-10 minutes until smooth and elastic. -
Step 5
Place the dough in a lightly greased bowl, cover, and let it rise in a warm place for 1-1.5 hours, or until doubled in size. -
Step 6
Punch down the dough, then roll it out to about 1/2-inch thickness. Cut out doughnuts using a doughnut cutter or two round cutters of different sizes. -
Step 7
Place the cut doughnuts on parchment-lined baking sheets, cover, and let them rise for another 20-30 minutes. -
Step 8
Heat the olive oil in a deep pot or Dutch oven to 350°F (175°C). Carefully fry the doughnuts, a few at a time, for 1-2 minutes per side, until golden brown. -
Step 9
Remove doughnuts with a slotted spoon and drain on paper towels. While still warm, toss in the 4 oz sugar or a cinnamon-sugar mixture. -
Step 10
Once cooled slightly, fill with jam, chocolate hazelnut spread, or whipped cream, if desired.
Important Information
Nutrition Facts (Per Serving)
It is important to consider this information as approximate and not to use it as definitive health advice.
Allergy Information
Please check ingredients for potential allergens and consult a health professional if in doubt.