Classic Scones Recipe- Tender, Crumbly, Perfect Butter Jam
Classic scones are more than just a baked good; they’re a warm hug in edible form, a delightful whisper of tradition with every buttery bite. There’s an undeniable magic to a perfectly baked scone – that slight crispness on the exterior giving way to a tender, crumbly interior, just begging for a dollop of clotted cream and a smear of jam. Why do we adore them so? Perhaps it’s their comforting simplicity, a recipe passed down through generations, or maybe it’s the way a plate of freshly made classic scones instantly elevates any occasion, from a leisurely afternoon tea to a cozy breakfast. What truly makes them special is their versatility; while the foundation is wonderfully straightforward, the possibilities for customization are endless, ensuring each batch is a personal culinary triumph.
Classic Scones
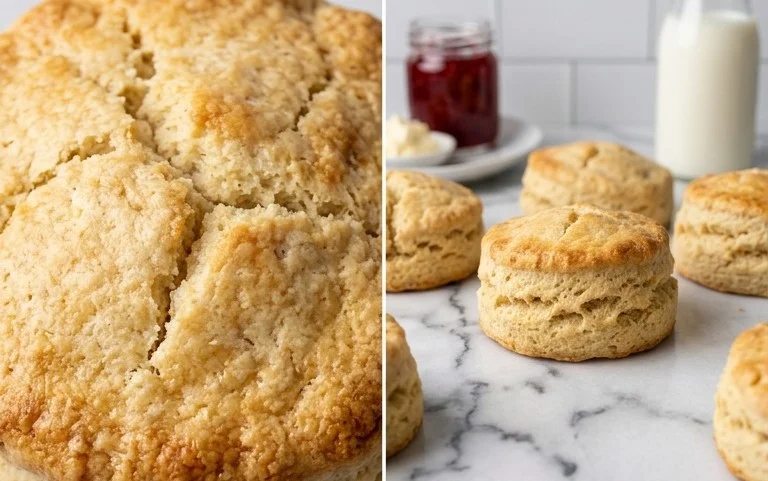
There’s something undeniably comforting about a perfectly baked scone. Golden brown on the outside, wonderfully tender and crumbly on the inside, and just begging to be slathered with butter and jam. Today, we’re diving into the heart of classic scone-making, a recipe that’s both forgiving for beginners and satisfying for seasoned bakers. These aren’t your dry, cakey imitations; these are the real deal – light, airy, and bursting with that homemade charm. Whether you’re planning a special brunch, a cozy afternoon tea, or simply craving a delightful treat, these classic scones are sure to impress.
The secret to a truly exceptional scone lies in a few key techniques: cold ingredients, a gentle hand, and the right balance of leavening. Don’t be intimidated; with these clear instructions and a little practice, you’ll be pulling beautifully risen scones from your oven in no time. Let’s get started on this delightful journey to scone perfection!
Ingredients:
- 3 cups (381 grams) all-purpose flour, (measured correctly by spooning into the cup and leveling off)
- 1/3 cup (66 grams) granulated sugar
- 1 teaspoon fine sea salt
- 1 tablespoon baking powder
- 1/2 teaspoon baking soda
- 1 1/2 sticks (170 grams) unsalted butter, (cold and cubed)
- 1 cup (237 grams) buttermilk
- 2 large eggs, (divided: 1 for the dough, 1 for the egg wash)
- 1 teaspoon vanilla extract
- Coarse sugar, (for topping)
Preparing the Dough: The Foundation of Flaky Goodness
The foundation of any great scone lies in the proper preparation of the dry and wet ingredients, and especially in how they’re combined. This initial stage sets the stage for that desirable tender crumb.
1. Whisk Together the Dry Ingredients: In a large mixing bowl, combine the 3 cups (381 grams) of all-purpose flour, 1/3 cup (66 grams) of granulated sugar, 1 teaspoon of fine sea salt, 1 tablespoon of baking powder, and 1/2 teaspoon of baking soda. Whisk these ingredients together thoroughly. Ensuring the leavening agents are evenly distributed is crucial for a consistent rise. You want to eliminate any pockets of baking powder or soda, which could lead to unevenly risen or bitter-tasting scones. Give it a good, energetic whisk until everything is uniformly blended.
2. Cut in the Cold Butter: Now comes a critical step for achieving that signature flaky texture. Add the 1 1/2 sticks (170 grams) of cold, cubed unsalted butter to the dry ingredients. Using a pastry blender, two forks, or even your fingertips, cut the butter into the flour mixture. The goal is to break down the butter into small pieces, roughly the size of peas. You should still see some larger flecks of butter, about the size of small pebbles, interspersed throughout the mixture. These larger pieces will melt in the oven, creating steam and those delightful pockets of flakiness. Avoid overworking the butter into the flour, as this can lead to a tougher scone. The mixture should resemble coarse crumbs with some larger butter pieces visible.
Combining Wet and Dry: A Gentle Touch is Key
Once your dry ingredients and butter are prepped, it’s time to introduce the wet ingredients. This stage requires a delicate hand to avoid overdeveloping the gluten in the flour, which would result in tough scones.
3. Mix the Wet Ingredients and Add to Dry: In a separate small bowl, whisk together 1 cup (237 grams) of buttermilk, 1 large egg (save the second egg for the egg wash later), and 1 teaspoon of vanilla extract. Pour this wet mixture into the bowl with the flour and butter. Using a fork or a rubber spatula, gently stir the ingredients together just until they *barely* come together. The dough will be shaggy and a bit sticky. It’s important to stop mixing as soon as you no longer see streaks of dry flour. Overmixing at this stage is a common pitfall that leads to dense scones. A few streaks of flour remaining are perfectly fine; they’ll be incorporated during the next step.
Shaping and Baking: The Grand Finale
With your dough ready, it’s time to shape your scones and send them off to bake. This is where their beautiful golden color and delightful rise will truly come to life.
4. Shape the Dough: Lightly flour a clean work surface. Turn the shaggy dough out onto the floured surface. Gently bring the dough together with your hands, just enough to form a cohesive mass. Do not knead the dough vigorously. You want to handle it as little as possible. Pat the dough into a round disk, about 3/4 to 1 inch thick. If you’re feeling ambitious, you can gently fold the dough in half or thirds a couple of times to create more layers, but this is optional. Once the disk is formed, you can either cut it into wedges using a sharp knife or a bench scraper, or use a biscuit cutter to create individual rounds. For wedges, cut the disk into 8 equal pieces. If using a biscuit cutter, dip it in flour between each cut to prevent sticking. Place the shaped scones onto a baking sheet lined with parchment paper, leaving a little space between them.
5. Egg Wash and Bake: In a small bowl, whisk the remaining large egg with a tablespoon of water or milk to create an egg wash. This is what will give your scones that beautiful golden-brown sheen. Lightly brush the tops and sides of each scone with the egg wash. This step also helps the coarse sugar adhere. Generously sprinkle the tops of the scones with coarse sugar. This adds a delightful sparkle and a pleasant crunch. Preheat your oven to 400°F (200°C). Bake the scones for 18-22 minutes, or until they are puffed up and beautifully golden brown. You can test for doneness by inserting a toothpick into the center of a scone; it should come out clean.
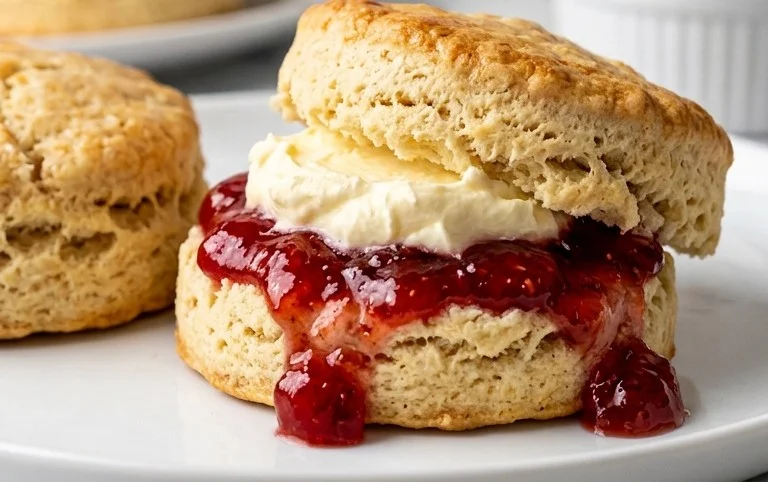
Allow the scones to cool on the baking sheet for a few minutes before transferring them to a wire rack to cool completely. They are best enjoyed warm, fresh from the oven, with your favorite accompaniments like clotted cream, butter, jam, or even a drizzle of honey. Enjoy these delightful, homemade classic scones!
Conclusion:
There you have it – a foolproof guide to making the most delightful classic scones! This recipe is truly fantastic because it delivers that perfect balance of tender crumb, light crisp exterior, and a subtle sweetness that forms the ideal canvas for your favourite toppings. Whether you’re a baking novice or a seasoned pro, these scones are remarkably straightforward to whip up, making them a wonderful weekend treat or an elegant addition to any afternoon tea.
I love serving these warm, right out of the oven, with a generous dollop of clotted cream and a spoonful of good quality jam. They’re also divine with a smear of butter, or even enjoyed plain with a cup of tea. For variations, don’t hesitate to fold in fresh berries like blueberries or raspberries, or perhaps some chopped chocolate chips for a sweeter indulgence. A sprinkle of orange or lemon zest can add a wonderful citrusy brightness too. I really hope you give this classic scones recipe a try – I promise you won’t be disappointed with the wonderfully buttery, crumbly results!
Frequently Asked Questions:
Why are my scones tough?
Tough scones are often a result of overmixing the dough. Once you add the liquid, mix only until just combined. Overworking the gluten in the flour develops too much structure, leading to a chewy texture.
Can I make the dough ahead of time?
Yes, you can! Prepare the dough up to the point of shaping. Wrap it tightly in plastic wrap and refrigerate for up to 24 hours. When ready to bake, let it sit at room temperature for about 15-20 minutes to make it easier to cut.
What’s the best way to store leftover scones?
Once completely cooled, store scones in an airtight container at room temperature for up to 2 days. For longer storage, you can freeze them in a single layer in a freezer bag for up to 2 months. Reheat gently in a low oven to refresh their texture.
Classic Scones
A timeless recipe for tender and flaky classic scones, perfect for any occasion.
Ingredients
-
3 cups (381 grams) all-purpose flour
-
1/3 cup (66 grams) granulated sugar
-
1 teaspoon fine sea salt
-
1 tablespoon baking powder
-
1/2 teaspoon baking soda
-
1 1/2 sticks (170 grams) unsalted butter, cold and cubed
-
1 cup (237 grams) buttermilk
-
2 large eggs, divided
-
1 teaspoon vanilla extract
-
Coarse sugar, for topping
Instructions
-
Step 1
Preheat oven to 400°F (200°C). Line a baking sheet with parchment paper. -
Step 2
In a large bowl, whisk together flour, sugar, salt, baking powder, and baking soda. -
Step 3
Cut in the cold butter using a pastry blender or your fingertips until the mixture resembles coarse crumbs. -
Step 4
In a separate bowl, whisk together buttermilk, one of the eggs, and vanilla extract. -
Step 5
Pour the wet ingredients into the dry ingredients and stir until just combined. Do not overmix. -
Step 6
Turn the dough out onto a lightly floured surface and gently pat into a 1-inch thick circle. Cut into 12 wedges. -
Step 7
Place scones on the prepared baking sheet. Brush the tops with the remaining egg and sprinkle with coarse sugar. -
Step 8
Bake for 15-18 minutes, or until golden brown and puffed.
Important Information
Nutrition Facts (Per Serving)
It is important to consider this information as approximate and not to use it as definitive health advice.
Allergy Information
Please check ingredients for potential allergens and consult a health professional if in doubt.