Best Homemade Salsa Recipe- Fresh Vibrant Flavor
The Best Homemade Salsa is not just a condiment; it’s a celebration. Forget those bland store-bought jars that taste more like disappointment than deliciousness. We’re talking about vibrant, fresh flavors that burst in your mouth, a symphony of ripe tomatoes, zesty lime, and just the right amount of kick. Why do we all adore salsa so much? It’s the ultimate crowd-pleaser, perfect for dipping chips, topping tacos, or even jazzing up grilled chicken. What truly makes The Best Homemade Salsa special is its unparalleled freshness and the ability to customize it precisely to your liking. Imagine the satisfaction of scooping a chip into a bowl of salsa you made with your own two hands – it’s a culinary triumph waiting to happen. This recipe is your ticket to unlocking that incredible taste and transforming any meal into a fiesta.
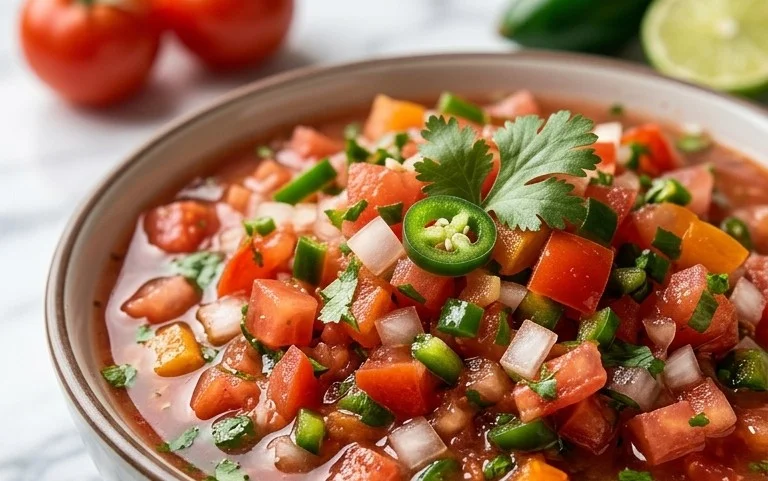
The Best Homemade Salsa
There’s nothing quite like the vibrant, fresh taste of homemade salsa. Forget those store-bought jars that often taste bland or overly processed. This recipe for “The Best Homemade Salsa” is a game-changer. It’s robust, perfectly balanced, and incredibly versatile. Whether you’re pairing it with tortilla chips, topping tacos, or drizzling it over grilled chicken, this salsa will be your new go-to. We’re focusing on a recipe that’s also designed for safe and proper canning, ensuring you can enjoy this deliciousness all year round. The key is using fresh, quality ingredients and taking a little time to let the flavors meld. Get ready to impress yourself and anyone lucky enough to share this with you!
Ingredients:
- 10 cups peeled, chopped and drained tomatoes (see note)
- 3 cups chopped onion
- 1 3/4 cups chopped green bell pepper
- 5 medium jalapeños, finely chopped, membranes and seeds removed (leave in for extra spice) – about 1 to 1 1/4 cups
- 7 cloves garlic, finely minced
- 2 1/2 teaspoons ground cumin
- 2 1/2 teaspoons coarsely ground black pepper
- 2 1/2 tablespoons canning or pickling salt (see note)
- 1/3 cup chopped fresh cilantro
- 1/3 cup sugar (optional, depending on sweetness of tomatoes)
- 1 1/4 cups apple cider vinegar (see note)
- 16 ounces tomato sauce (NOT optional – necessary for safe canning/proper pH)
- 12 ounces tomato paste (optional if you want a thicker salsa)
Note on Tomatoes: For the best salsa, I highly recommend using ripe, flavorful tomatoes. Roma tomatoes (also known as plum tomatoes) are excellent because they are meaty and have fewer seeds. When chopping, ensure you drain them well to prevent a watery salsa. You can achieve this by placing the chopped tomatoes in a colander set over a bowl for at least 30 minutes, pressing gently to remove excess liquid. If using other varieties, you might need to adjust the sugar based on their sweetness.
Note on Salt: Canning or pickling salt is recommended because it does not contain anti-caking agents, which can make the brine cloudy. Regular table salt can be used in a pinch, but pickling salt is ideal for clarity.
Note on Apple Cider Vinegar: The acidity of apple cider vinegar is crucial for the safety of the canned salsa, as it helps to ensure a proper pH level. White vinegar can be substituted if absolutely necessary, but apple cider vinegar adds a subtle depth of flavor.
Cooking Instructions:
1. Prepare Your Produce: The foundation of any great salsa is good preparation. Start by finely chopping your onions and green bell peppers. The size of your chop will influence the texture of the final salsa, so aim for a consistent, relatively small dice. Next, mince your garlic cloves; a fine mince will ensure the garlic flavor is distributed evenly throughout the salsa without any overpowering chunks. For the jalapeños, decide on your desired spice level. Carefully remove the membranes and seeds if you prefer a milder heat. If you love a kick, leave some or all of them in. Finely chop them, remembering that the smaller you chop them, the more their heat will distribute. Finally, peel, chop, and drain your tomatoes as described in the note above. This draining step is crucial for a thick, flavorful salsa, not a watery one.
2. Combine and Cook the Base: In a large, heavy-bottomed pot or Dutch oven, combine the drained chopped tomatoes, chopped onion, chopped green bell pepper, chopped jalapeños, and minced garlic. Add the ground cumin, coarsely ground black pepper, and canning or pickling salt. Stir everything together thoroughly. Now, it’s time to add the liquids that will form the core of your salsa. Pour in the 1 1/4 cups of apple cider vinegar and the 16 ounces of tomato sauce. If you’re opting for a thicker, richer salsa, stir in the 12 ounces of tomato paste at this stage. If your tomatoes are not particularly sweet, you can add the 1/3 cup of sugar now. Stir everything well to ensure all ingredients are evenly distributed.
3. Simmer and Meld Flavors: Place the pot over medium-high heat and bring the mixture to a boil, stirring occasionally. Once it reaches a rolling boil, reduce the heat to medium-low, cover the pot loosely (leaving a small gap for steam to escape), and let it simmer. This simmering process is where the magic happens, allowing the flavors to meld and deepen. Simmer for at least 30 to 45 minutes, stirring every 10-15 minutes to prevent sticking. You’ll notice the salsa will begin to thicken slightly, and the vegetables will soften. Taste the salsa during this simmering period and adjust seasonings if needed. You might want a little more salt, pepper, or even a touch more cumin. Remember that flavors will intensify as it cools and after canning.
4. Add Fresh Cilantro and Final Adjustments: After the initial simmering period of 30-45 minutes, remove the lid completely. If you find your salsa is still too thin for your liking, you can continue to simmer uncovered for another 15-30 minutes, or until it reaches your desired consistency. Now, it’s time to add the fresh, bright flavor of cilantro. Stir in the 1/3 cup of chopped fresh cilantro. Cook for just another 5 minutes, uncovered, to allow the cilantro to wilt slightly and release its aroma without becoming overcooked. This final addition of cilantro right at the end preserves its vibrant green color and fresh taste. Give the salsa one final taste test. If you’re concerned about the sweetness or acidity balance, this is your last chance for minor adjustments before canning.
5. Canning Process (for long-term storage): If you plan to can your salsa for shelf-stable storage, ensure you have sterilized canning jars, lids, and rings. Ladle the hot salsa into the prepared jars, leaving about 1/2 inch of headspace (the space between the top of the salsa and the rim of the jar). Wipe the rims clean with a damp cloth, then place the lids on and screw the rings on fingertip tight. Process the jars in a boiling water bath canner according to safe canning guidelines. Typically, this involves processing pint-sized jars for about 15-20 minutes. Always follow tested canning recipes and procedures for your specific altitude to ensure safety. Once processed, remove the jars from the canner and let them cool undisturbed on a towel-lined counter for 12-24 hours. You should hear the satisfying “ping” as the lids seal. Check seals by pressing the center of the lid; if it doesn’t flex, it’s sealed. Store sealed jars in a cool, dark place. If you are not canning, allow the salsa to cool completely, then store it in airtight containers in the refrigerator for up to two weeks. This homemade salsa is truly a labor of love, but the delicious results are absolutely worth it!
Conclusion:
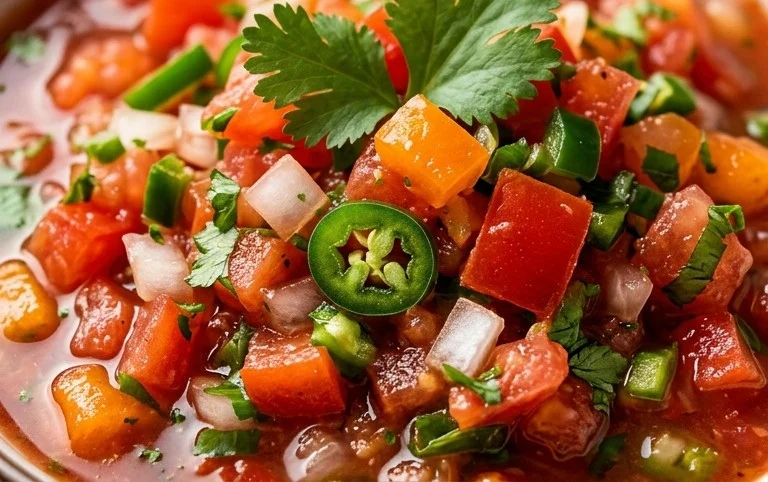
There you have it – the ultimate guide to making the best homemade salsa that will truly elevate your snacking and meal experiences! This recipe isn’t just simple; it’s a flavor powerhouse that consistently outshines any store-bought option. The beauty of this salsa lies in its freshness, vibrant colors, and perfectly balanced zest. You’re in complete control of the spice level, ensuring it’s exactly to your liking. Imagine the satisfaction of presenting a bowl of this delicious, homemade creation to friends and family – they’ll be asking for the recipe, guaranteed!
This versatile salsa is perfect for dipping tortilla chips, dolloping onto tacos, enchiladas, or grilled meats, and even as a zesty topping for scrambled eggs. Don’t be afraid to experiment with variations! Try adding a pinch of smoked paprika for depth, a touch of honey for sweetness, or even some diced mango or pineapple for a tropical twist. The possibilities are endless, and each iteration will be uniquely yours. I truly encourage you to give this recipe a try; you won’t regret the burst of fresh flavor you’ll achieve!
Frequently Asked Questions:
Q: How long does homemade salsa last?
A: Stored in an airtight container in the refrigerator, the best homemade salsa will typically last for 5 to 7 days. The acidity from the tomatoes and lime juice acts as a natural preservative. For the freshest taste, it’s always best to consume it within the first few days.
Q: Can I make this salsa ahead of time?
A: Absolutely! In fact, making it a few hours or even the day before serving allows the flavors to meld beautifully. This is a great advantage for entertaining, as you can prepare it in advance and have it ready to go when your guests arrive.
Q: My salsa is too chunky. How can I make it smoother?
A: If you prefer a smoother salsa, you have a couple of options. You can pulse it a few more times in your food processor or blender until it reaches your desired consistency. Alternatively, you can carefully transfer it to a blender and process it until smooth. Just be careful not to over-process it into a liquid!
The Best Homemade Salsa
A delicious and easy-to-make homemade salsa recipe perfect for canning and enjoying year-round. Adjust spice level to your preference.
Ingredients
-
10 cups peeled, chopped and drained tomatoes
-
3 cups chopped onion
-
1 3/4 cups chopped green bell pepper
-
1 1/4 cups finely chopped jalapeños, membranes and seeds removed
-
7 cloves garlic, finely minced
-
2 1/2 teaspoons ground cumin
-
2 1/2 teaspoons coarsely ground black pepper
-
2 1/2 tablespoons canning or pickling salt
-
1/3 cup chopped fresh cilantro
-
1/3 cup sugar
-
1 1/4 cups apple cider vinegar
-
16 ounces tomato sauce
-
12 ounces tomato paste
Instructions
-
Step 1
Prepare your ingredients: Chop tomatoes, onion, bell pepper, jalapeños, and mince garlic. Ensure tomatoes are well-drained. -
Step 2
In a large pot, combine chopped tomatoes, onion, green bell pepper, jalapeños, minced garlic, ground cumin, black pepper, salt, cilantro, sugar (if using), apple cider vinegar, tomato sauce, and tomato paste. -
Step 3
Bring the mixture to a boil over medium-high heat, then reduce heat to low and simmer, uncovered, for 1 hour, stirring occasionally. The salsa should thicken slightly. -
Step 4
While the salsa is simmering, prepare your canning jars. Wash and sterilize jars, lids, and rings according to canning guidelines. -
Step 5
Carefully ladle the hot salsa into prepared jars, leaving 1/2 inch headspace. Wipe rims clean and place lids and rings on tightly. -
Step 6
Process the jars in a boiling water bath for 15 minutes (adjust for altitude if necessary). Remove jars from the water bath and let them cool completely on a towel-lined counter for 12-24 hours.
Important Information
Nutrition Facts (Per Serving)
It is important to consider this information as approximate and not to use it as definitive health advice.
Allergy Information
Please check ingredients for potential allergens and consult a health professional if in doubt.