Back to School Cookies Fun & Easy Recipe
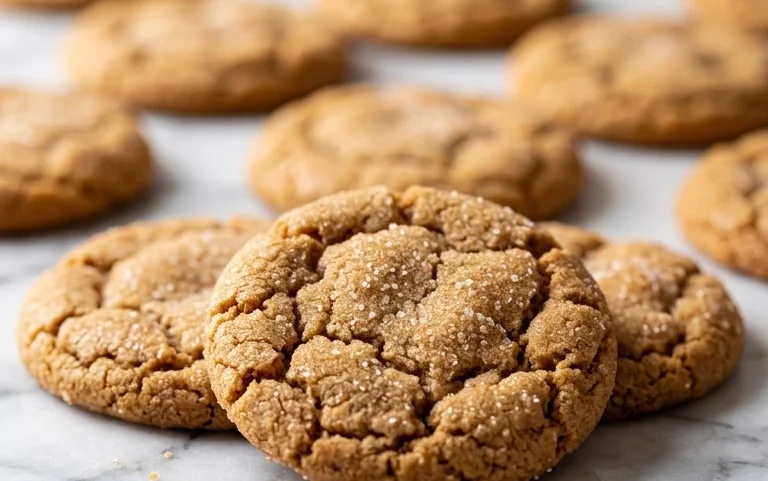
Back to school cookies are more than just a sweet treat; they’re a delicious portal to comfort and nostalgia for students and parents alike. As the crisp autumn air begins to blow and the excitement of a new academic year fills the house, there’s nothing quite like the aroma of freshly baked cookies to mark the occasion. These aren’t just any cookies; they are little edible hugs, perfect for tucking into lunchboxes or enjoying after a long day of learning. We love them because they evoke cherished memories of childhood, of crisp notebooks and sharpened pencils, and the simple joy of a homemade reward. What makes our specific back to school cookies so special is their perfect balance of chewy centers and slightly crisp edges, infused with just the right hint of spice and sweetness. They’re designed to be easy enough for busy weeknights but impressive enough to share, making them the ultimate symbol of a happy and delicious return to school.

Back to School Cookies
As the days get shorter and the leaves begin to hint at changing colors, a familiar feeling settles in: back to school! While the summer days of freedom fade, the excitement of a new academic year can be celebrated in many ways. One of my favorite ways to usher in this new season is by baking! These “Back to School Cookies” are designed to be both fun and delicious, perfect for a treat after a long day of learning or for packing in a lunchbox for a special surprise. They’re simple enough for little hands to help with, and the customizable decorations make them a fantastic canvas for back-to-school themes. Think little apples, pencils, school buses, or even just cheerful, colorful designs!
These cookies are a classic sugar cookie base, but with a little extra love. The secret to their wonderfully soft yet slightly crisp texture lies in a few key elements, like using softened butter for optimal creaming and not overmixing the dough once the flour is added. This ensures we don’t develop too much gluten, which can lead to tough cookies. The vanilla extract adds that comforting, familiar sweetness that everyone loves, and a touch of almond extract can be added for an extra layer of aromatic depth if you’re feeling adventurous. I’ve found that chilling the dough is a crucial step. It not only makes the dough easier to handle and cut out shapes without spreading too much in the oven, but it also allows the flavors to meld beautifully. So, let’s get baking and make this school year a little sweeter!
Ingredients:
- 1 cup (2 sticks) unsalted butter, softened
- 1 ½ cups granulated sugar
- 2 large eggs
- 1 teaspoon vanilla extract
- ½ teaspoon almond extract (optional)
- 3 cups all-purpose flour
- 1 teaspoon baking powder
- ½ teaspoon salt
- For decorating (optional):
- Powdered sugar
- Milk or water
- Food coloring (various colors)
- Sprinkles, edible glitter, small candies
Preparing the Cookie Dough
Creaming the Butter and Sugar
First things first, let’s get our butter and sugar ready. In a large mixing bowl, combine the softened unsalted butter and granulated sugar. You want your butter to be soft enough that it yields easily to the touch, but not melted. This is important for creating a light and airy texture in your cookies. Using an electric mixer (either a stand mixer with a paddle attachment or a hand mixer), cream these two ingredients together on medium speed for about 3 to 5 minutes. You’re looking for a pale yellow, fluffy mixture. This process, called creaming, incorporates air into the dough, which contributes to the cookies’ rise and tender crumb. Scrape down the sides of the bowl periodically to ensure everything is evenly combined.
Adding Wet Ingredients
Once you have that beautifully creamy mixture, it’s time to add the eggs and extracts. Add the large eggs one at a time, beating well after each addition until fully incorporated. This helps emulsify the mixture and prevents it from separating. Now, stir in the vanilla extract and the almond extract, if you’re using it. The almond extract is a wonderful addition that complements the vanilla and adds a subtle, sophisticated flavor that pairs beautifully with the sweetness of the sugar cookies. Beat until just combined.
Combining Dry Ingredients
In a separate medium bowl, whisk together the all-purpose flour, baking powder, and salt. Whisking these dry ingredients together thoroughly ensures that the leavening agent (baking powder) and salt are evenly distributed throughout the flour. This is crucial for consistent baking and flavor in every single cookie.
Bringing it All Together
Now, gradually add the dry ingredients to the wet ingredients in your mixing bowl. Start the mixer on low speed and mix until just combined. Be careful not to overmix at this stage. Overmixing can develop the gluten in the flour, resulting in tough cookies. You want to mix until there are no visible streaks of flour remaining. The dough will be soft and a little sticky at this point, which is perfectly normal.
Chilling the Dough
This is a vital step for success! Divide the dough in half. Flatten each half into a disc, wrap it tightly in plastic wrap, and refrigerate for at least 1 hour, or up to 2 days. Chilling the dough makes it firm and much easier to roll out and cut into shapes without distortion. It also allows the flavors to deepen and meld together.
Baking the Cookies
Preheating and Preparing Baking Sheets
When you’re ready to bake, preheat your oven to 350°F (175°C). Line baking sheets with parchment paper. Parchment paper is your best friend here; it prevents the cookies from sticking and makes for easy cleanup. If you don’t have parchment paper, you can lightly grease your baking sheets, but parchment paper generally yields the best results.
Rolling and Cutting the Dough
On a lightly floured surface, take one disc of chilled dough and roll it out to about ¼-inch thickness. It’s important to get this thickness consistent for even baking. Too thin and they’ll bake too quickly and become crispy; too thick and they might be doughy in the center. Now comes the fun part! Use your favorite cookie cutters to cut out your back-to-school shapes. You can use classic shapes like circles and squares, or go for more thematic ones like apples, pencils, books, or rulers. Gather the scraps, re-roll gently (try not to overwork the dough), and cut out more shapes until all the dough is used.
Baking to Perfection
Carefully transfer the cut-out cookies to the prepared baking sheets, leaving about 1 to 2 inches of space between them. Bake for 8 to 12 minutes, or until the edges are lightly golden brown and the centers are set. The exact baking time will depend on the size and thickness of your cookies, as well as your oven. It’s always a good idea to keep a close eye on them during the last few minutes of baking. You want them baked through but not overdone, as they will continue to cook slightly on the hot baking sheet after being removed from the oven.
Cooling the Cookies
Once baked, let the cookies cool on the baking sheets for 5 minutes before transferring them to a wire rack to cool completely. This initial cooling on the baking sheet allows them to firm up enough to be moved without breaking. Allowing them to cool completely on a wire rack is crucial before decorating. If you try to decorate warm cookies, your frosting will melt and slide right off, creating a mess. Patience here is key for beautiful, decorated cookies!
Decorating Your Back to School Treats
Once your cookies are completely cool, it’s time for the creative part! You can make a simple glaze by whisking together powdered sugar with a tablespoon or two of milk or water until you reach a smooth, pourable consistency. Add food coloring to achieve vibrant school-themed colors like red for apples, yellow for buses, or blue and green for general school spirit. You can then dip the cookies into the glaze or use a spoon to drizzle it over. For more intricate designs, use a piping bag fitted with a small round tip. Add sprinkles, edible glitter, or small candies to enhance your designs. Let the icing set completely before storing or packing them for school. Enjoy your delicious back-to-school creations!

Conclusion:
And there you have it – the perfect recipe for delicious Back to School Cookies! These delightful treats are a fantastic way to celebrate the start of a new academic year, offering a wonderfully simple yet satisfying baking experience. Their cheerful appearance and comforting, classic cookie flavor make them an instant hit with both kids and adults. Whether you’re packing them for a lunchbox surprise, enjoying them with a glass of milk after school, or simply looking for a sweet pick-me-up, these cookies are sure to bring smiles.
We’ve kept this recipe versatile, allowing you to customize it to your heart’s content. Try adding a sprinkle of colorful candy bits, a swirl of chocolate chips, or even a dash of cinnamon for a warm, autumnal twist. Serve them warm from the oven for an extra gooey center, or let them cool completely for a crispier bite. Don’t hesitate to get creative and make these Back to School Cookies your own!
Frequently Asked Questions:
Can I make these cookies ahead of time?
Absolutely! These cookies store exceptionally well. Once cooled, store them in an airtight container at room temperature for up to 3-4 days. They are perfect for making a batch on the weekend to have ready for busy school days.
What if I don’t have all the ingredients?
While the core ingredients are essential for the best texture and flavor, you can often make simple substitutions. For example, if you’re out of regular flour, you might be able to use all-purpose flour, though the texture might vary slightly. Always try to stick to the main ingredients like butter, sugar, and eggs for optimal results.
How can I make these cookies healthier?
For a slightly healthier spin, consider reducing the sugar slightly, or swapping out some of the all-purpose flour for whole wheat flour. You could also incorporate ingredients like oats or finely chopped nuts for added fiber and nutrients.
Back to School Cookies
Simple and cheerful sugar cookies perfect for welcoming students back to school. Easy to decorate and always a hit!
Ingredients
-
1 cup unsalted butter, softened
-
1 cup granulated sugar
-
1 large egg
-
1 teaspoon vanilla extract
-
2 1/2 cups all-purpose flour
-
1 teaspoon baking powder
-
1/2 teaspoon salt
-
Non-alcoholic clear extract (for optional flavor enhancement)
Instructions
-
Step 1
In a large bowl, cream together the softened butter and granulated sugar until light and fluffy. -
Step 2
Beat in the egg and vanilla extract (and non-alcoholic clear extract, if using) until well combined. -
Step 3
In a separate bowl, whisk together the flour, baking powder, and salt. -
Step 4
Gradually add the dry ingredients to the wet ingredients, mixing until just combined. Do not overmix. -
Step 5
Chill the dough for at least 30 minutes. Preheat oven to 375°F (190°C). Line baking sheets with parchment paper. -
Step 6
Roll out the dough on a lightly floured surface to about 1/4-inch thickness. Cut out desired shapes with cookie cutters. -
Step 7
Place cookies on prepared baking sheets and bake for 8-10 minutes, or until edges are lightly golden. -
Step 8
Let cookies cool on the baking sheets for a few minutes before transferring to a wire rack to cool completely. Decorate as desired.
Important Information
Nutrition Facts (Per Serving)
It is important to consider this information as approximate and not to use it as definitive health advice.
Allergy Information
Please check ingredients for potential allergens and consult a health professional if in doubt.