Brown Butter Dulce de Leche Rice Krispie Treats
Brown Butter Dulce de Leche Rice Krispie Treats are more than just a nostalgic childhood favorite; they’re a sophisticated upgrade that will have everyone begging for the recipe. Forget the basic version you remember – we’re diving into a world of nutty, caramelized bliss. Who doesn’t love the irresistible crunch and chew of a perfectly made Rice Krispie treat? But what elevates these Brown Butter Dulce de Leche Rice Krispie Treats into something truly extraordinary is the magic that happens when we infuse them with the warm, toasty notes of brown butter and the rich, creamy sweetness of dulce de leche. It’s that subtle depth of flavor, that hint of grown-up indulgence, that makes these irresistible. Prepare to transform a simple snack into a show-stopping dessert!
Why You’ll Adore These
The Perfect Blend of Nostalgia and Sophistication
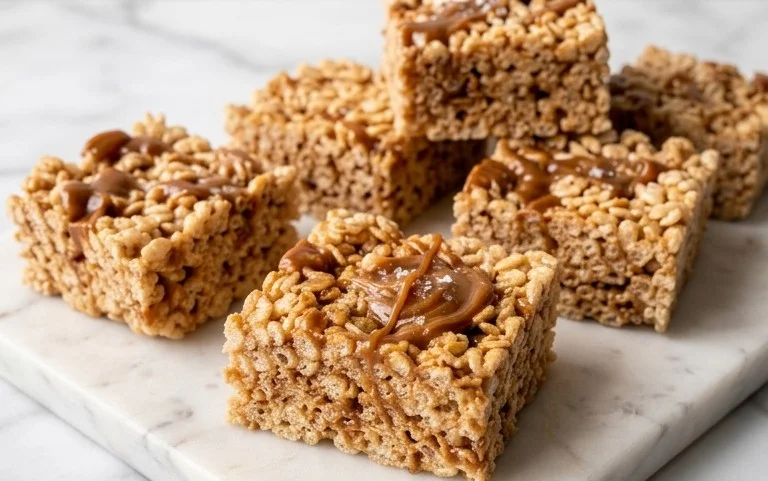
Brown Butter Dulce de Leche Rice Krispie Treats
Get ready to elevate your classic Rice Krispie treat game to a whole new level of decadence. We’re talking about a symphony of flavors and textures that will have your taste buds singing. Forget the ordinary; these Brown Butter Dulce de Leche Rice Krispie Treats are a delightful twist on a beloved childhood favorite. The nutty, caramelized notes of brown butter meld beautifully with the rich, creamy sweetness of dulce de leche, all while retaining that signature crispy, chewy texture we know and love. They’re surprisingly simple to make, yet their sophisticated flavor profile makes them perfect for any occasion, from a casual gathering to a special dessert.
The magic starts with browning the butter. This simple step transforms ordinary butter into a liquid gold with a complex, toasted flavor that adds an incredible depth to the treats. Then, we introduce the dulce de leche, a creamy caramel-like confection made from slowly cooked milk and sugar. Its smooth, luscious texture and intense sweetness are the perfect counterpoint to the crunchy cereal. Combining these elements with gooey marshmallows and a hint of sea salt creates a truly irresistible treat. Trust me, once you try these, you’ll never go back to the basic version again!
Ingredients:
- 5 Tablespoons Butter
- ¼ teaspoon Vanilla Extract
- 10 Cups Mini Marshmallows (divided)
- 6 Cups Rice Krispies Cereal (cinnamon sugar flavored, see note)
- ½ teaspoon Sea Salt (fine grain)
- ½ Can Dulce de Leche
Cinnamon Sugar Rice Krispies Cereal Note:
For these treats, I highly recommend using cinnamon sugar flavored Rice Krispies cereal. If you can’t find it, don’t worry! You can easily make your own by tossing 6 cups of plain Rice Krispies cereal with 2 tablespoons of granulated sugar and 1 teaspoon of ground cinnamon in a large bowl. This little addition really amplifies the warm, comforting flavors of the recipe.
Cooking Instructions:
1.
The Art of Browning Butter
This is where the flavor really begins to develop! In a large, heavy-bottomed saucepan, melt your 5 tablespoons of butter over medium heat. As it melts, it will start to foam. Continue to cook, stirring occasionally, and watch the milk solids at the bottom of the pan. They will start to turn a golden brown and then a rich, amber color. You’ll also notice a nutty, toasted aroma filling your kitchen – that’s your cue that the butter is perfectly browned! This process should take about 5-8 minutes. Be vigilant; browned butter can go from perfectly caramelized to burnt very quickly. Once it reaches that beautiful amber hue, immediately remove the pan from the heat to prevent it from burning. Swirl the pan gently to ensure even browning.
2.
Marshmallow Melting and Dulce de Leche Infusion
Still in the same saucepan (no need to wash it!), add 8 cups of the mini marshmallows to the warm, browned butter. Reduce the heat to low. Stir continuously until the marshmallows are completely melted and smooth. This will create a wonderfully gooey base. Once the marshmallows are mostly melted, add the ½ can of dulce de leche to the pan. Stir it in gently, allowing it to melt and combine with the marshmallow mixture. The dulce de leche will swirl into the marshmallow goo, creating beautiful caramel ribbons. This is where the flavor starts to get seriously interesting! Keep stirring until everything is well combined and has a creamy, luscious texture.
3.
Incorporating the Cereal and Salt
Now it’s time to add the star of the crunch: your 6 cups of cinnamon sugar flavored Rice Krispies cereal. Gently fold the cereal into the melted marshmallow and dulce de leche mixture. You want to coat every single crispy flake with that delicious caramel-marshmallow goodness. Be careful not to crush the cereal; the texture is key! Once the cereal is evenly distributed, sprinkle in your ½ teaspoon of fine grain sea salt. The salt is crucial for balancing the sweetness and enhancing all the other flavors. Give it one final gentle stir to make sure the salt is incorporated throughout.
4.
Adding the Remaining Marshmallows for Texture
For an extra layer of gooeyness and textural contrast, we’re going to add the remaining 2 cups of mini marshmallows now. This is a slightly different technique than just melting all the marshmallows at once. Stir these last 2 cups of marshmallows in *just* until they are slightly softened and partially melted but still hold their shape. You want pockets of melty marshmallow distributed throughout the treats, rather than one solid mass. This step adds delightful chewy surprises within the crunchy cereal.
5.
Pressing and Setting the Treats
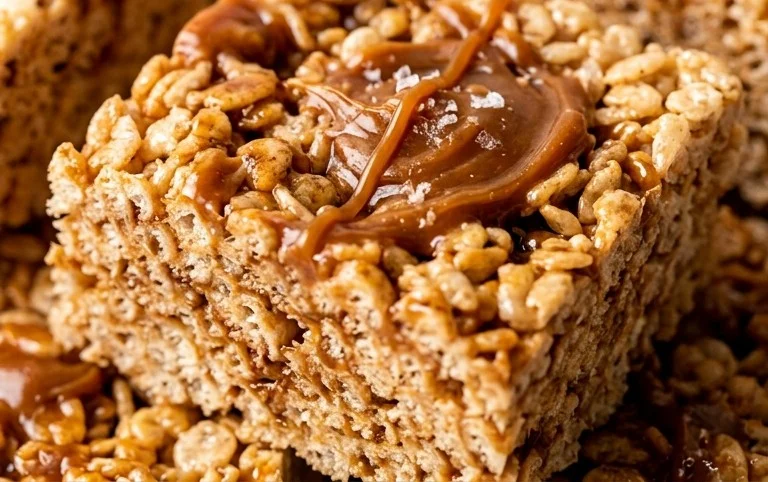
Lightly grease a 9×13 inch baking pan with butter or cooking spray, or line it with parchment paper, leaving some overhang to help lift the treats out later. This makes for easy cleanup! Carefully spoon the Rice Krispie mixture into the prepared pan. Now, here’s a key tip: lightly butter or wet your hands (or use a greased spatula) before pressing the mixture into the pan. Don’t press too hard, or your treats will be dense and hard. You want to gently and evenly spread the mixture to the edges of the pan. Once pressed, let the treats sit at room temperature for at least 30 minutes to an hour to set up completely. Resist the urge to cut them too soon, as they will fall apart! Once firm, you can use the parchment overhang to lift the entire slab out of the pan and cut them into your desired squares. Enjoy these incredible treats!
Conclusion:
These Brown Butter Dulce de Leche Rice Krispie Treats are an absolute game-changer! The nutty depth of brown butter perfectly complements the rich, caramel sweetness of dulce de leche, transforming the classic cereal treat into a sophisticated dessert. The chewy, gooey texture combined with that irresistible flavor profile makes them an instant hit for any occasion. They’re incredibly easy to whip up, making them ideal for a last-minute craving or for impressing guests without a lot of fuss.
I love serving these warm, right out of the pan, but they’re also delicious at room temperature. They’re fantastic on their own, but consider drizzling them with a little extra dulce de leche or a sprinkle of flaky sea salt for an elevated experience. For variations, try adding a touch of cinnamon to the brown butter for an extra warm spice note, or fold in some chopped toasted pecans or walnuts for added crunch and nutty flavor. You could even swirl in some melted dark chocolate for a decadent twist.
I truly hope you’ll give these Brown Butter Dulce de Leche Rice Krispie Treats a try. They’re a simple yet spectacular way to enjoy a beloved classic with a gourmet upgrade. Let me know how yours turn out!
Frequently Asked Questions:
Can I make these ahead of time?
Absolutely! These treats can be made a day or two in advance and stored in an airtight container at room temperature. They might firm up slightly, but you can gently warm them in the microwave for a few seconds if you prefer a gooier texture.
What’s the best way to cut them neatly?
For clean cuts, allow the treats to cool and set completely. Lightly butter or spray a sharp knife with non-stick spray before cutting. Running the knife under hot water and drying it between cuts can also help achieve cleaner lines.
Is there a dairy-free or vegan option?
Yes, you can adapt this recipe! Use a vegan butter substitute and ensure your marshmallows are vegan. For the dulce de leche, look for a vegan caramel sauce or a coconut-based dulce de leche alternative.
Brown Butter Dulce de Leche Rice Krispie Treats
A delightful twist on classic Rice Krispie Treats, featuring the rich, nutty flavor of brown butter and the sweet, caramel notes of dulce de leche. These treats offer a chewy texture with a hint of salt to balance the sweetness. The cinnamon sugar cereal adds an extra layer of warmth and spice.
Ingredients
-
5 Tablespoons Butter
-
¼ teaspoon Vanilla Extract
-
10 Cups Mini Marshmallows (divided)
-
6 Cups Rice Krispies Cereal (cinnamon sugar flavored)
-
½ teaspoon Sea Salt (fine grain)
-
½ Can Dulce de Leche
Instructions
-
Step 1
In a large saucepan, melt the butter over medium heat. Continue to cook, stirring occasionally, until the butter turns a deep golden brown and smells nutty. Be careful not to burn it. -
Step 2
Remove the browned butter from heat. Stir in 5 cups of the mini marshmallows until melted and smooth. Stir in the vanilla extract and sea salt. -
Step 3
Add the cinnamon sugar flavored Rice Krispies cereal and the dulce de leche to the marshmallow mixture. Stir until well combined and the cereal is evenly coated. -
Step 4
Gently fold in the remaining 5 cups of mini marshmallows. Stir just until they begin to soften but are not completely melted, for a chewier texture. -
Step 5
Press the mixture evenly into a greased 9×13 inch baking pan using a buttered spatula or wax paper. Do not press too firmly, as this can make the treats hard. -
Step 6
Let the treats cool completely at room temperature for at least 1 hour before cutting into squares. Store in an airtight container.
Important Information
Nutrition Facts (Per Serving)
It is important to consider this information as approximate and not to use it as definitive health advice.
Allergy Information
Please check ingredients for potential allergens and consult a health professional if in doubt.