Cozy Maple Glazed Pumpkin Poptarts Recipe
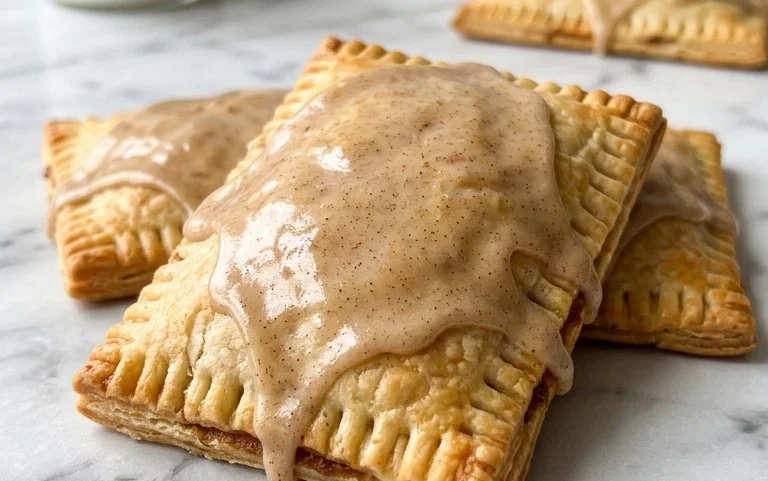
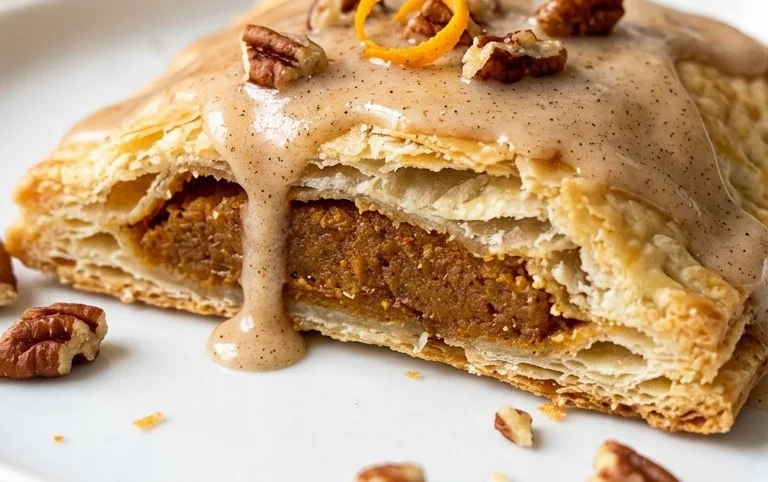
Maple-Glazed Pumpkin Poptarts are more than just a nostalgic treat; they’re a warm hug in pastry form, a delightful burst of autumnal bliss perfect for any time of day. Who doesn’t remember the joy of biting into a perfectly crisp, sweet pastry, especially when it’s filled with the comforting flavors of pumpkin and spice? I know I do! These aren’t your average store-bought poptarts. My Maple-Glazed Pumpkin Poptarts take that beloved classic and elevate it with the rich, deep sweetness of maple and the earthy goodness of real pumpkin. We’re talking about flaky, buttery crust encasing a velvety smooth pumpkin filling, all drizzled with a luscious maple glaze that hardens into the most satisfying crackle. They’re incredibly satisfying, deceptively simple to make, and guaranteed to bring a smile to your face with every bite. Get ready to fall in love with homemade Maple-Glazed Pumpkin Poptarts all over again.
Maple-Glazed Pumpkin Poptarts
There’s something undeniably cozy about the autumn season, and for me, that coziness often involves a warm, spiced treat. While store-bought pop-tarts are a convenient classic, crafting them at home unlocks a whole new level of deliciousness. And what better flavor to celebrate fall than pumpkin, with a delightful maple twist? These Maple-Glazed Pumpkin Poptarts are surprisingly easy to make and deliver a burst of autumnal flavor that’s perfect for breakfast, a snack, or even a simple dessert. Forget those pre-packaged pastries; we’re about to elevate your pop-tart game!
The magic of these pop-tarts lies in their simple yet satisfying filling and a luscious maple glaze that ties everything together. We’re starting with a readily available ingredient – a refrigerated pie crust – making the pastry part a breeze. This means you can spend more time enjoying the warm, spicy pumpkin filling and less time fussing with dough. The brown sugar adds a wonderful depth of sweetness, while the maple flavoring and pumpkin pie spice create that quintessential fall aroma and taste. And the glaze? It’s the perfect finishing touch, adding a sweet, maple-infused sheen that’s utterly irresistible. Get ready to impress yourself and anyone lucky enough to share these with you!
Ingredients:
- 1 refrigerated pie crust roll (found near the refrigerated biscuits)
- 1/2 cup canned pumpkin
- 1/3 cup brown sugar (packed)
- 1/2 tsp. maple flavoring
- 1/4 tsp. pumpkin pie spice
- dash of salt
- 1/2 cup powdered sugar
- 1/4 tsp. maple flavoring
- 1 Tbsp. milk
Making the Pumpkin Filling
The heart of these pop-tarts is the delicious pumpkin filling. It’s incredibly straightforward to whip up. In a medium bowl, combine the canned pumpkin, packed brown sugar, 1/2 teaspoon of maple flavoring, pumpkin pie spice, and a dash of salt. Give it a good stir until everything is well incorporated and smooth. The brown sugar will lend a lovely caramel note to the filling, complementing the earthy flavor of the pumpkin. Don’t skimp on the pumpkin pie spice; it’s what gives you that warm, comforting fall essence. Ensure the salt is just a small pinch; it doesn’t make the filling salty, but rather enhances all the other flavors.
Assembling Your Poptarts
Now for the fun part – assembling our pop-tarts! Carefully unroll your refrigerated pie crust onto a lightly floured surface. We want to work with it gently to avoid tearing. Using a sharp knife or a pizza cutter, cut the pie crust into four equal rectangles. You can adjust the size if you prefer larger or smaller pop-tarts, just be sure to cut them as evenly as possible for consistent baking.
Take two of your pie crust rectangles and place them on a parchment-lined baking sheet. These will be your bottom crusts. Now, spoon about 1 to 1.5 tablespoons of the pumpkin filling onto the center of each of these bottom crusts. Spread it out gently, leaving a small border around the edges, about 1/4 inch. This border is crucial because it will help seal the pop-tarts and prevent the filling from escaping during baking. Think of it as creating a little dam for our delicious pumpkin goodness.
Once you’ve filled your bottom crusts, take the remaining two pie crust rectangles and carefully place them on top of the filled ones. Gently press down around the edges with your fingers to seal the two layers of dough together. For an extra secure seal and a decorative touch, you can use the tines of a fork to crimp the edges all the way around. This not only looks nice but also ensures that your filling stays safely tucked inside while baking.
Baking to Golden Perfection
Preheat your oven to 375 degrees Fahrenheit (190 degrees Celsius). Carefully transfer the baking sheet with your assembled pop-tarts into the preheated oven. Bake for approximately 15 to 20 minutes, or until the crust is a beautiful golden brown and appears puffed and flaky. Keep an eye on them, as ovens can vary. You’re looking for that perfect balance of cooked-through dough and slightly softened filling. If you notice any spots browning too quickly, you can loosely tent them with foil.
Whipping Up the Maple Glaze
While your pop-tarts are cooling slightly on the baking sheet, it’s time to prepare the glorious maple glaze. In a small bowl, whisk together the powdered sugar, the remaining 1/4 teaspoon of maple flavoring, and the tablespoon of milk. Start with the tablespoon of milk and add more, a tiny bit at a time, if needed, until you reach your desired glaze consistency. You want it thick enough to coat the pop-tarts without being too runny, but thin enough to drizzle easily. A good consistency is like a thick but pourable icing. The maple flavoring here really shines, giving that irresistible sweet maple aroma and taste.
Glazing and Enjoying
Once your pop-tarts have cooled for a few minutes and are no longer piping hot (you don’t want the glaze to melt off completely), it’s time for the grand finale. Drizzle the maple glaze generously over the top of each pop-tart. You can use a spoon or a small piping bag for a more controlled drizzle. For an extra touch of autumnal flair, you could even sprinkle a little extra pumpkin pie spice or some finely chopped pecans on top of the wet glaze. Let the glaze set for a few minutes before digging in. The warmth of the pop-tart will slightly melt the glaze, creating a delightful, sweet coating. And there you have it – homemade Maple-Glazed Pumpkin Poptarts ready to be devoured! Enjoy the delightful combination of flaky pastry, warm spiced pumpkin, and sweet maple goodness.
Conclusion:
I hope you’re as excited to bake these Maple-Glazed Pumpkin Poptarts as I am to eat them! This recipe truly is a celebration of autumn’s finest flavors, bringing together the comforting sweetness of pumpkin with the warm embrace of maple and a delightful buttery crust. They’re perfect for a cozy breakfast, a delightful afternoon treat, or even a fun dessert that will impress friends and family. The versatility of these poptarts means you can adapt them to your liking, making them a truly personal favorite. So, gather your ingredients, put on some festive music, and get ready to create something truly special!
For serving, these are absolutely divine warm from the oven, but they also hold up beautifully for packing in lunchboxes or enjoying later. Consider pairing them with a hot cup of coffee or a creamy chai latte for the ultimate autumnal experience. If you’re feeling adventurous, try adding a sprinkle of cinnamon or nutmeg to the pumpkin filling, or even some chopped pecans for an extra crunch in your Maple-Glazed Pumpkin Poptarts.
Frequently Asked Questions:
How can I make the pastry extra flaky?
For the flakiest pastry, ensure your butter is very cold and cut into small cubes. Don’t overwork the dough; mix just until it comes together. Chilling the dough for at least 30 minutes before rolling also makes a significant difference in achieving that desirable flaky texture.
Can I make these ahead of time?
Absolutely! You can prepare the poptart dough and the pumpkin filling up to two days in advance and store them separately in the refrigerator. You can also assemble the poptarts and chill them before baking, but it’s best to glaze them once they’ve cooled after baking.
What if I don’t have pumpkin puree?
While pumpkin puree is ideal for that classic flavor, you could experiment with other cooked and mashed winter squashes like butternut squash or acorn squash for a similar texture, though the flavor will be slightly different.
Maple-Glazed Pumpkin Poptarts
Homemade poptarts with a sweet pumpkin filling and a maple glaze, inspired by classic fall flavors.
Ingredients
-
1 refrigerated pie crust roll
-
1/2 cup canned pumpkin
-
1/3 cup brown sugar (packed)
-
1/2 tsp. maple flavoring
-
1/4 tsp. pumpkin pie spice
-
dash of salt
-
1/2 cup powdered sugar
-
1/4 tsp. maple flavoring
-
1 Tbsp. milk
Instructions
-
Step 1
Preheat oven to 375°F (190°C). Unroll the pie crust and cut into 12 equal rectangles. -
Step 2
In a medium bowl, combine canned pumpkin, brown sugar, 1/2 tsp. maple flavoring, pumpkin pie spice, and salt. Mix until well combined. -
Step 3
Spoon about 1 tablespoon of the pumpkin filling onto 6 of the pie crust rectangles, leaving a small border around the edges. -
Step 4
Place the remaining 6 pie crust rectangles on top of the filling. Crimp the edges with a fork to seal. -
Step 5
Place the poptarts on a baking sheet lined with parchment paper. Bake for 15 minutes, or until golden brown. -
Step 6
While the poptarts are baking, whisk together powdered sugar, 1/4 tsp. maple flavoring, and milk to create the glaze. -
Step 7
Let the poptarts cool slightly, then drizzle with the maple glaze.
Important Information
Nutrition Facts (Per Serving)
It is important to consider this information as approximate and not to use it as definitive health advice.
Allergy Information
Please check ingredients for potential allergens and consult a health professional if in doubt.